Info Sheets Home - Polytunnels & Greenhouses - Community Allotments - Planting Guides - Organic Food Growing - Pests & Diseases
As mentioned planting in rows is done for most plants, however others will need to be planted a little differently. Your peas and beans fall into this group. They will need individual planting at the base of some supports.
Its important to remember that peas and beans (in this case runner and French beans) grow and climb differently.
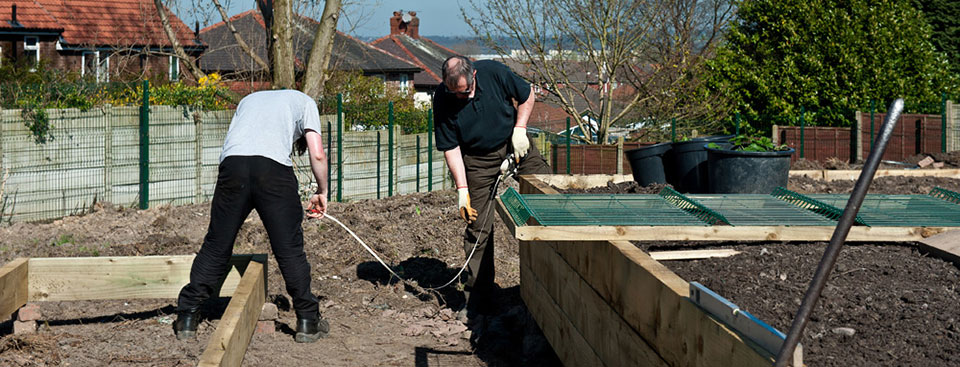
With the two points above in mind its important to get your support poles right. Runner beans as stated will climb up anything but the common thing to use is bamboo canes. You can buy these at garden centres or DIY stores. These can be arranged in a tepee shape or a line of triangles with a supporting mid cane. The thick end can be pushed in to the round and the other end tied with string to the opposing and mid cane. Runner beans grow to about 6-7ft so try to get your structure this high. You can also use string tied to a frame work or thin branches cut from trees.(Please don’t cut down from the countryside, ask a ranger at a local park if they have any cuttings or use your own or friends and family)
Peas will find bamboo canes too smooth with nothing for their tendrils to hook onto. So you can use ‘pea sticks’, which are literally sticks, or string tied to a frame work or even some old square fencing. Most peas will grow a lot shorter than runner beans (check back of packet for height) and therefore will only need sticks etc that are about 3ft high.
Make sure you get the supports in first before the seeds or plants as you don’t want to damage anything by stabbing in a pole too close!
Download Guide to planting legumes
People get very confused about potatoes because there are so many types and varieties and then they have extra titles, such as, First early, maincrop etc. It can be confusing! The terms First Early etc refers to when to plant the potato and therefore when to harvest.
So you plant and harvest potatoes at these times-
1st Early: Plant Feb-April > Harvest June-July
2nd Early: Plant March-May > Harvest July-August
Maincrop: Plant April > Harvest August-Sept
Late Maincrop: Plant May > Harvest Sept-Nov
Now like a lot of things in gardening you may read about different advice and info on potatoes especially about planting and harvest times. Again like the vegetables families, pick one type of advice and try to stick to it, to begin with anyway, and once you get more confident you can change things.
There are loads of different varieties of potatoes out there, so once you’ve decided on how many you want from the 1st earlies etc its then time to look at the variety. Most websites or stores will have them organised into 1st Early, Maincrop etc and then there will be lots of varieties within that. Because we have had very wet summers up here in the North West for the past 5 yrs and because around Wigan we have very wet clay soil I like to go for ‘blight resistant’ varieties when I can. This doesn’t always work but it does help. N.B. Blight is a fungal infection of potatoes, very prevalent in wet conditions.
So for this year I have bought
Cara - maincrop resistant to blight
Sante - maincrop resistant to blight
Red Duke of York - 1st early resistant to nothing but a lovely red colour
Kestrel - 2nd early resistant to a few things but not blight
So we shall see how I go with that selection over the year
You need to buy your seed potatoes about 6 weeks before you intend to plant, so about the end of January.
Seed potatoes are young potatoes grown from seed. They are quite small and feel a bit soft. You can use normal shop bought eating potatoes but these wont be at all disease resistant and so it’s a bit of a risk. You can buy a bag of about 15-25 seed potatoes for about £3.95 and you should get about 8ish potatoes off each seed, so they’re quite a cheap veggie to buy. These seed potatoes will have been treated and especially grown to produce the best results.
When you receive your potatoes you will need to ‘chit’ them.
Chitting is the reason why you need to buy your potatoes 6 weeks before planting. Chitting isn’t absolutely necessary however is does mean earlier crops and for your earlies it means avoiding putting the potatoes in ground that is too cold. So I would suggest you chit your earlies but you don’t have to for your mains (although I still do..).
Your seed potatoes will have what are called ‘eyes’ which look like little lumps, these are where the shoots will come from that you are encouraging by chitting.
To chit your potatoes you will need to place them in a container where light and warmth can get to them so an egg box is perfect. You will need to look at each potato and decide which end has the most ‘eyes’. This end is the one you want facing upwards. The seed potatoes need to be somewhere warm and light but not too warm or light.. So the windowsill of a north facing room is ideal. Ideally you want dark shoots about 1” long then they will be ready for planting. If your chits are long white shoots then are being kept somewhere too warm with not enough light. Just make sure you label them so you don’t lose track of which is your 1st early, 2nd early etc
There are quite a few methods out there on how to plant potatoes, but I’ll just mention the main two methods here for planting in the ground and also container growing.
Once you start to see the green leaves appear from the potatoes its time to start ‘earthing up’. This basically means to keep covering the green leaves with soil until you have a mound of about 7-9” high.
This earthing up protects the shoots and prevents the tubers turning green and therefore inedible.
If you are planting potatoes in containers then you can either buy special potato bags, and again you should be able to find these in a variety of shops, or just as good is a large pot, old plastic stacking box or car tyres stacked on top of each other, about 3 tyres should do it. With any of these options the method of planting is the same
You can start off your onions from seed and it is quite satisfying to see a nice onion come from a tiny seed. However it is a long process and well I’m a bit impatient so I like to buy onion sets. They are basically tiny onions that have been grown from seed and then dug up as soon as they reach the right size. They are cheap to buy and give a great head start.
You simply take each little set and push the bottom gently into the soil so you can still see ¼ of it above ground at the spacing directed by the packet. And then you should get lovely large onions! Just watch for birds and sometimes mice that like to pull the sets out and throw them to one side, if they’re not too damaged just push back in. This is where scarecrows or cd’s hung up are useful to keep birds away.
Garlic is bought in cloves, yes a bit like the stuff you buy to eat. However these cloves have been specially grown to be at their best for growing and are free from disease. See the planting and harvesting chart to see when you can plant these. Unlike onion sets they need to be dug into the ground slightly, at about twice the depth of the clove itself. The packet should give more direction. They need quite a while to mature and make sure you remove any flowers the plant produces to ensure maturity of the garlic. You can also buy Elephant garlic which grows huge bulbs, but they have a more gentle flavour.
Click here to download a table outlining planting and harvest times